After posting a number of clips on Vimeo, I had many requests to explain how I managed to get ICE to construct a tree. Here are the basics of what I did, to get you started:-
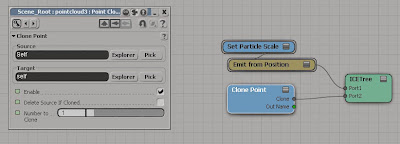
So start by getting an empty point cloud and create an ICE tree. Plug in an Emit from Position node, emitting just 1 particle. It needs to have zero speed and no randomise direction, so just set all these values to 0.
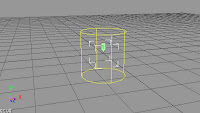
Make the size 1, shape Cylinder and Orientation 0,1,0,0.
Set the particle scale to 0.1, 1, 0.1 by plugging a Set Particle Scale node in the Execute on Emit port. This gives us our basic branch.

Connect a Clone Point node and set the Target to Self. The number to clone is the number of branches.

The next step requires building a small but very useful compound. This is one I use all the time, so I've found it very useful to export it to the menu. It basically allows you to move a particle along its local axis, which is crucial for this tree building to work. The only exposed value is the Rotate Vector - Vector input, which is used for doing the translation of the particles. Basically the input will be an x,y,z amount to translate.
Plug this compound into the On Creation port of the Clone Point node. Set it's value to 0, 1, 0 to translate the particle 1 unit in its local Y. This leaves it only half way up, but from here we want to spin it around by some random amount.
In this example I've used a Randomise Rotation by Cone node, which pretty much does what I want. I've increased the Clone Number to 3, so we have a total of 4 particles.
Now, reusing the Local translation compound, just plug it into the next On Creation port on the Clone Point node, to move it along its local Y, into its correct position.
This is the basic setup for duplicating each level of branches, but to make it more flexible we're going to create a simple loop and use the particles State ID to add as many levels of branching as we want. To start with, get the particles State ID and run it through an If Equals setup.
The basics of the loop are formed with a Repeat with Counter node, which is one of Phills ICE 100 compounds. Out of habit I changed the counter name to self.mycounter, but of course you can leave the default name in here. We'll use the counter value to test the Particle IDs, so that ID 0 will Clone ID 1's, ID 1's will Clone ID 2's etc. So use a Get Data node to get the counter value and run it into the Equals condition.
Increment it with an Add node and set the new cloned particles State ID's. (Use a Set Data node and explore the pointcloud for set State_ID)
Increase the Number of Iterations in the Repeat with Counter node, and with a bit of luck you should now have a few more branches.
This is the basic setup which shows one way of dealing with this type of problem. It can be adapted in many ways to build a complex compound with all sorts of user functionality, as I've demonstrated in my Vimeo clips.
For example, here's a way of reducing the size of the branches, per iteration. Using the particles scale, extract the Y value and use that as the Local Translation value. Multiply the scale value by something like 0.8, to reduce it slightly, then use that new value as the Local translation again, and finally set the Particle Scale.
That's just about it. Here's a link to the Vimeo clips:-
Here's a screengrab of my more-or-less completed Tree Compound:-
Chris
chris.marshall@eclipsecreative.co.uk


